
For product and e-commerce teams
Product guide
What to prepare so your customers can try your frames on: two photos per frame, placed in a simple template, and the frame’s width. No 3D model, no scanning, no code on your side. Once the routine is in place, a frame takes about ten minutes.
Who does what
| Who | What | Where |
|---|---|---|
| Product / e-commerce team | Photos and measurements of each frame, which products get the try-on, the privacy notice. | This page |
| Developer | Pastes one tag on the product page and fills it with each product’s images. | Developer guide |
| Svalbox | Your license, the domains it works on, and the dashboard accounts. | Contact us |
Developers have their own integration guide. For your license and domains, contact us.
The two templates
Every frame is described by two images that share one unit, 1u = the width of the frame, from hinge to hinge. Because both images use the same unit, the try-on knows how the temples connect to the front and how big the frame is on a face.
- Front, 2u × 1u (e.g. 1600 × 800 pixels): the frame seen face-on fills the middle square, from one hinge to the other, and the hinges sit on the horizontal centre line. The rest stays transparent.
- Left temple, 1u × 1u (e.g. 800 × 800 pixels, the same scale as the front): the arm seen from the outside, its hinge end on the left edge, on the centre line, running towards the ear.
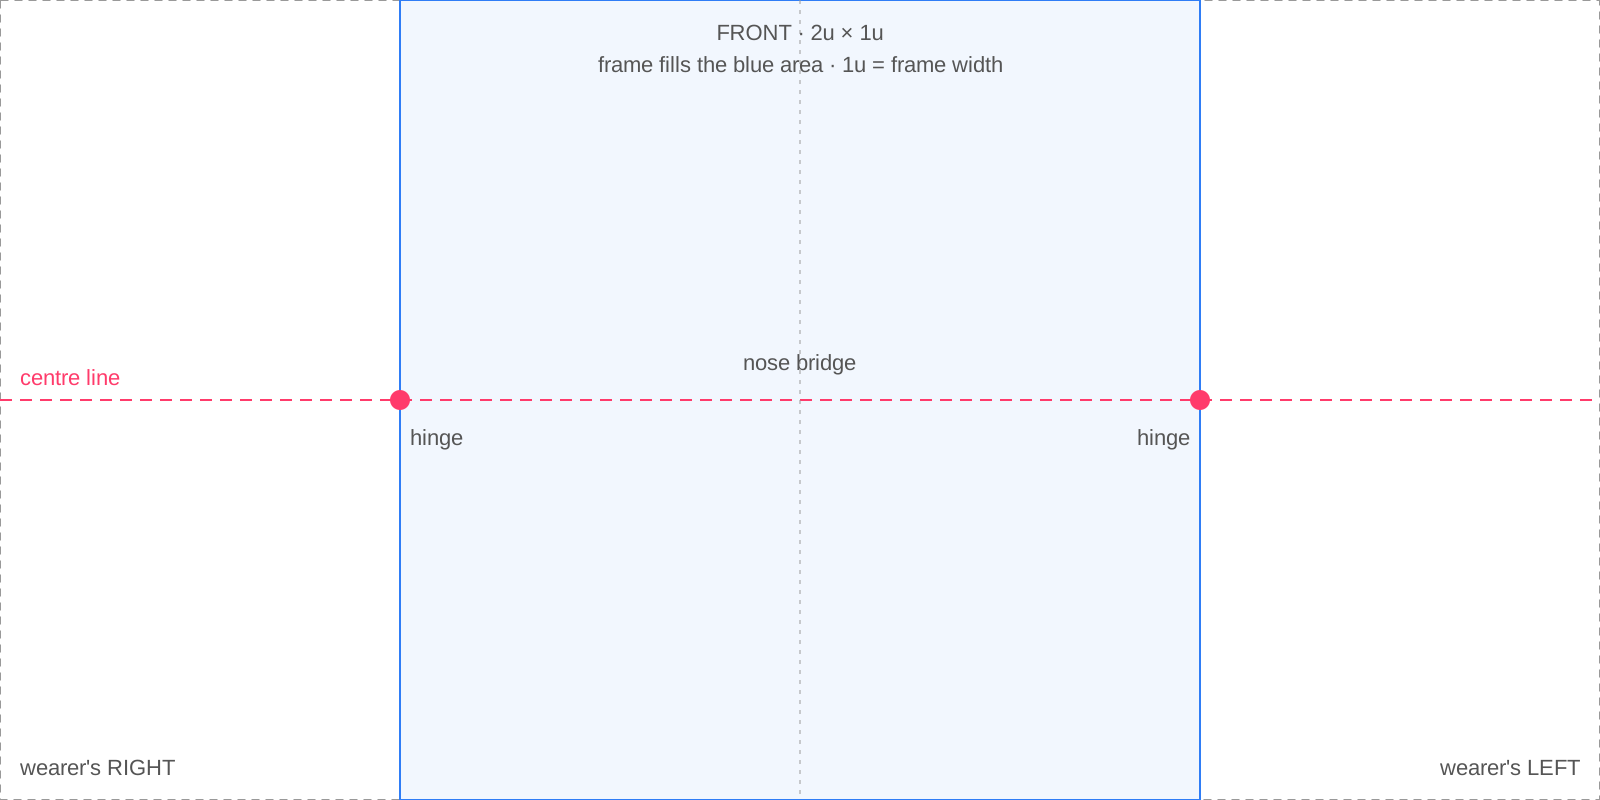
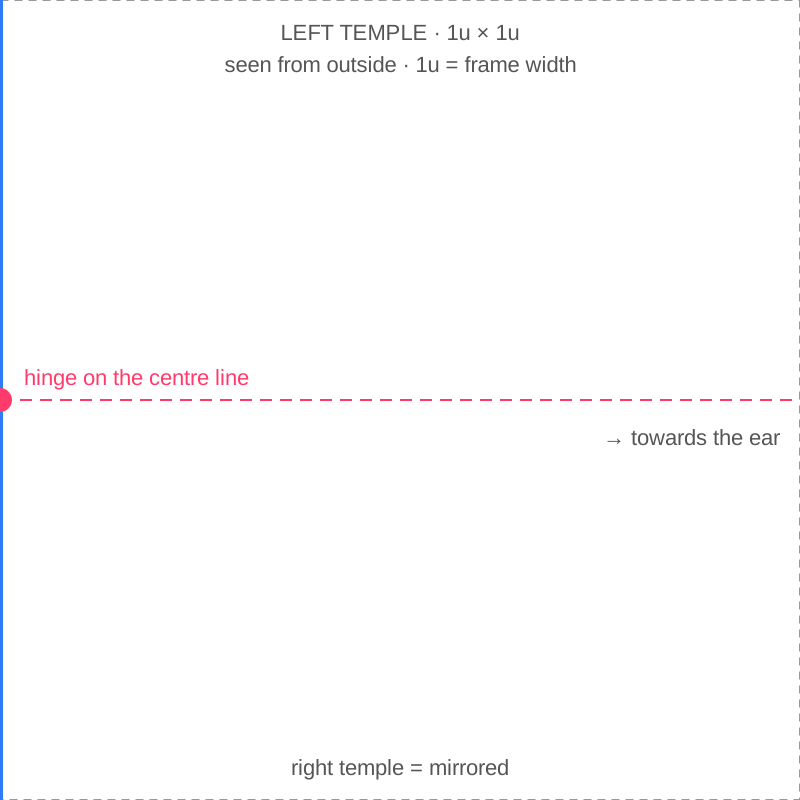
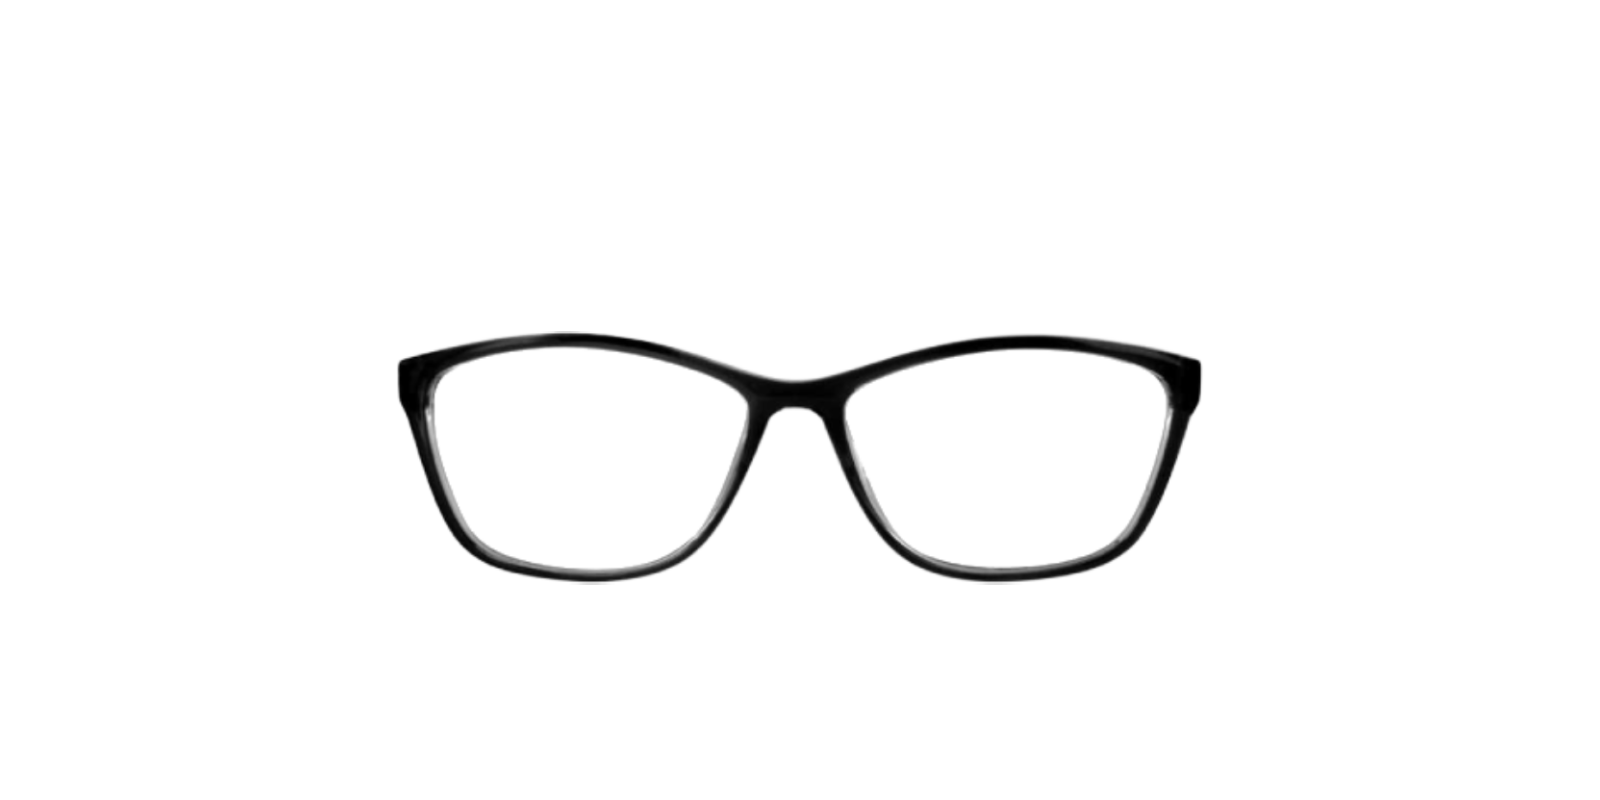
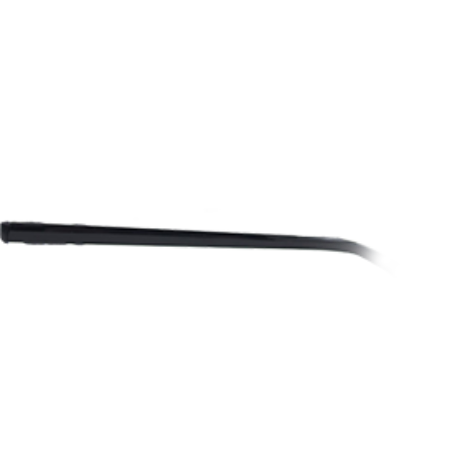
Download the templates: front · temple. They are SVG files that open in Photoshop, Illustrator, Figma or Affinity: put your photo under the guides, then hide the guides before exporting.
The right temple is the left one mirrored. Provide a right temple only when the two sides differ (a logo on one side). For sunglasses, add a lens mask: the same framing as the front, opaque where the lenses are, transparent elsewhere. It lets the try-on tint the lenses and add reflections.
The try-on also finds the frame’s edges and hinges by itself in the images, so a few pixels off is fine. Following the template keeps every frame consistent.
Shooting the frames
- Front: the frame open, temples folded back or removed from view, camera exactly face-on at lens height. Use a long focal length (a telephoto lens, or the phone’s 2× or 3×) from a distance, so the frame isn’t distorted.
- Temple: the frame on its side, camera perpendicular to the arm, the whole arm in the picture.
- Light: soft and even, on a plain light background that’s easy to cut out. Avoid strong reflections on the lenses: the try-on adds its own.
- Packshots you already have often work: a straight front view and a straight side view are all that is needed.
Preparing the images
- Cut out the frame on a transparent background. Demo lenses go: keep them transparent (or, for clear frames with visible lenses, very lightly visible). Translucent acetate can stay partly transparent.
- Place the front in the front template: scale it so the frame goes exactly from one hinge mark to the other, hinges on the centre line, bridge in the middle.
- Place the temple in the temple template at the same scale as the front (if the frame is 800 pixels wide on the front, the temple image is 800 pixels wide too), hinge end against the left edge, on the centre line.
- Export as PNG with transparency, 1600 × 800 and 800 × 800. Larger sizes don’t look sharper on screen and load slower.
- Name the files after the product id, so your developer can map them without asking.
Measurements
The frame width (hinge to hinge, across the front) gives the frame its real size on the customer’s face. Measure it with a ruler, or take the “total width” from the supplier sheet. Without it, every frame defaults to 130 mm.
The numbers printed inside a temple, like 52□18 140, are the lens width, the bridge
and the temple length. They don’t give the total width directly: two lenses plus the bridge (52 + 18 + 52 = 122 mm) plus both
rims, usually 8 to 16 mm more. A ruler is quicker and exact.
Sport and wraparound frames curve strongly towards the temples: mark them as “sport” in the frame sheet, your developer adjusts the curve.
The frame sheet
One line per frame, handed to your developer with the images (a spreadsheet works well):
| Field | Example | Notes |
|---|---|---|
| Product id | nora-black | Your product or SKU reference: the dashboard shows it in “most tried frames”. |
| Front image | nora-black-front.png | Required. 2u × 1u. |
| Left temple image | nora-black-left.png | Required. 1u × 1u. |
| Right temple image | nora-black-right.png | Optional: only if it differs from the left one (logo, pattern). Otherwise the left one is mirrored. |
| Lens mask | nora-black-lenses.png | Optional. Needed for tinted lenses (sunglasses) and reflections. |
| Frame width | 138 mm | Required. Hinge to hinge, see Measurements. |
| Curve | standard / sport | Only for wraparound sport frames. |
| Lens tint | Green, Grey, Brown… | Sunglasses only: the colour of the lenses. |
Checking a frame
Before publishing, open the product page on a phone, start the try-on and look for:
- the bridge resting on the nose, not floating above or sinking in;
- the temples meeting the front at the hinges when you turn your head;
- a size that looks right next to the same frame worn in your product photos;
- no leftover background around the frame (a light halo means the cut-out needs another pass).
Most issues come from the front not filling the middle square exactly, or the temple not being at the same scale. Your developer can show the templates over the face to check the alignment (the template overlay of the developer guide).
Launch checklist
- ✓ The license key from Svalbox, and the list of domains the try-on must run on (shop, staging, preview).
- ✓ The frames that get the try-on first: start with the best sellers, 10 to 20 is plenty for a first release.
- ✓ For each frame: the images and the frame sheet below, handed to your developer.
- ✓ Where the “Try on” button goes on the product page: next to the photos works best.
- ✓ A sentence in your privacy notice (suggested text below).
- ✓ The people who should see the dashboard: Svalbox creates their accounts.
Privacy notice
The camera image is processed in the customer’s browser and never sent anywhere. A sentence you can adapt for your privacy notice:
Our virtual try-on, provided by Svalbox, uses your camera only inside your browser: the image is never sent or stored. To measure how the try-on is used, anonymous statistics are collected (try-ons started, frames viewed), with a random identifier kept in your browser. No IP address is stored.
If your consent banner must cover it, your developer can wait for consent before sending statistics (developer guide, “Privacy and consent”).
After launch
Your dashboard shows the try-ons and how many visitors start the camera, new and returning visitors, devices, countries, the product pages that engage most and the frames customers try most. Accounts sign in with their email address and a one-time code: no password to manage. See the demo dashboard.
Use it to decide which frames get the try-on next, which ones to feature, and which ones look better in photos than on a face. Questions about a frame’s images? Send them to us, we check them.